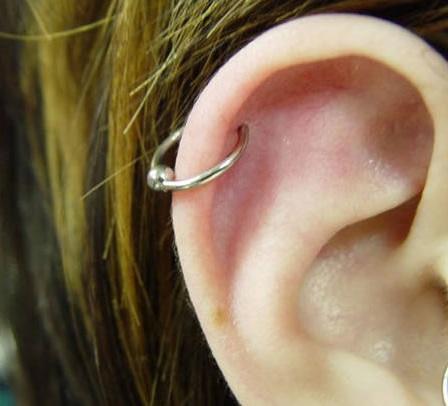
Ear piercing is one of the most common and popular body modifications worldwide. Whether you’re piercing your ear for the first time or adding a new hole to create a unique look, it’s important to understand the proper steps to ensure a clean, safe, and successful procedure. In this article, we’ll guide you through the essential steps to pierce your ear properly and the necessary aftercare to ensure your piercing heals well.

1. Prepare the Necessary Tools
Before you attempt an ear piercing, it’s crucial to have the right tools. While professional piercers use specialized equipment, such as a piercing gun or hollow needle, you can perform a safe DIY piercing with the following materials:
- Sterilized needle (preferably a piercing needle, not a sewing needle)
- Alcohol swabs for cleaning
- Sterile cotton pads or gauze
- Jewelry (a small, smooth stud made of hypoallergenic material, such as titanium, is ideal for initial piercings)
- Gloves (to keep everything hygienic)
- Ice cube (optional, to numb the area)
Ensure that everything is sterilized before starting to prevent infection. Using clean hands and sterile equipment is essential for a safe piercing.
2. Choose the Right Piercing Location
The first step in any ear piercing process is to determine where on the ear you’d like the hole. Some popular options include the earlobe, helix, or tragus. The earlobe is the most common and easiest place for a DIY piercing, especially for beginners. Make sure to mark the exact spot where you’d like to pierce the ear. You can use a surgical pen or a marker to create a small dot on the area to guide you.
Ensure that the location you choose aligns with your aesthetic preferences and is far enough from cartilage or nerves to avoid complications.
3. Clean and Sterilize the Area
Once you’ve marked the area for piercing, thoroughly clean both your ear and the piercing needle. Wash your hands with soap and water before touching anything to avoid contamination. Use alcohol or an antiseptic solution to clean the piercing area on your ear. Additionally, wipe the needle with an alcohol swab to ensure it is sterile.
If you’re using ice to numb the area, apply it gently for a few minutes before piercing. Ice can help reduce discomfort and minimize swelling.
4. Pierce the Ear
This is the most crucial step in the process. Hold the needle firmly and position it directly over the mark you made. Take a deep breath and, with a swift motion, push the needle through the earlobe in a straight line. Make sure to pierce in one fluid motion to reduce pain and prevent injury. If you’re nervous, try to maintain a steady hand.
Once the needle is through, remove it and immediately insert the jewelry (a small stud or hoop) into the hole. The jewelry should be smooth and comfortable for the initial healing process.
5. Clean the Piercing Site After the Procedure
After inserting the jewelry, it’s important to clean the piercing site to prevent infection. Use saline solution or an antiseptic spray to clean around the ear piercing. Be gentle and avoid touching the jewelry too much during the cleaning process. Wash your hands before touching the area again.
If you feel any discomfort or swelling, you can apply a cold compress for relief. However, do not remove the jewelry while the ear piercing is still healing, as this can cause the hole to close up quickly.
6. Care for Your Piercing
Caring for your ear piercing is essential to ensure it heals properly. Cleaning the piercing twice a day with saline solution or antiseptic is crucial to avoid infection. Avoid touching the ear piercing with dirty hands, and refrain from changing the jewelry too early.
If you’d like more detailed advice on how to care for your piercing during the healing process, check out our article on how to care for a piercing.
7. Know the Risks and Seek Professional Help When Needed
While DIY piercings are possible, it’s important to know that there are risks involved, such as infection, improper healing, and uneven piercing placement. If you feel uncomfortable or unsure at any point during the piercing process, it’s best to consult a professional piercer. They have the proper training, equipment, and experience to ensure that your ear piercing is done safely.
Additionally, remember that a professional will know the best aftercare routine tailored for different types of piercings. If you’re looking for a long-lasting, safe, and professional result, it’s always recommended to seek out a piercing specialist.
8. When to Seek Medical Attention
If you experience excessive pain, swelling, or notice pus coming from the ear piercing, it may be a sign of an infection. If this happens, remove the jewelry only if instructed to by a healthcare professional and seek medical advice immediately. It’s important not to ignore signs of infection, as untreated infections can lead to more serious health complications.
Conclusion
Piercing your ear at home is possible, but it requires careful preparation, cleanliness, and aftercare to ensure it heals properly. Follow the steps above, and be sure to take proper care of your ear piercing to avoid complications.
For further details on how to care for your piercing and speed up the healing process, read our comprehensive article on how to care for a piercing.
If you’re still unsure or want professional advice, here’s a helpful external link to a professional piercing guide.

